Thursday, February 25, 2016

Watch 3D Blu-ray Movies on Google Cardboard via Android/iOS Handsets

Summary: This article shows you how to easily and freely view 3D Blu-ray movies on your smartphone via Google Cardboard by ripping 3D Blu-ray to SBS MP4 videos.

Google Cardboard, another excellent virtual reality headset followed with Samsung Gear VR, Zeiss VR One, has gained widespread reputations amongest 3D lovers, not only because of its lower price, but also its powerful compatibility with nearly any smartphones including Android, iPhone 6 and iPhone 6 Plus. If you happen to have a bunch of 3D Blu-ray collections at home, it's a pity for you can not get them on your Andorid/iOS devices through Google Cardboard with 3D Effects. In this article, I'll glad to share some useful tips to help you move your 3D Blu-ray medias into Google Cardboard for viewing freely on your smartphone.


As a matter of fact, Google Cardboard lacks ability to play 3D Blu-ray movies but it can play Side-by-Side MP4 videos. That's to say, in order to view 3D Blu-ray movies in Google Cardboard successfully, you're advised to rip and convert 3D Blu-ray to SBS MP4 videos initially, and then you can use the Google Cardboard theater app to play the converted videos in 3D effect.

To do this, you can use Brorsoft's 3D Blu-ray to SBS MP4 converter tool. With it, you can convert 3D/2D Blu-ray to Google Cardboard supported side-by-side video files with lossless quality. In addition, it offers other 3D videos as MKV Top-bottom 3D video, MP4 top-bottom 3D video, MKV side-by-side 3D video, which can play on Gear VR, VR One, Oculus Rift DK2, Air VR, etc. perfectly. The equivalent Mac version is Brorsoft 3D Blu-ray Ripper for Mac. Now download the right version on your computer and follow the tips below to finish your task.

Rip 3D Blu-ray for playing on Google Cardboard

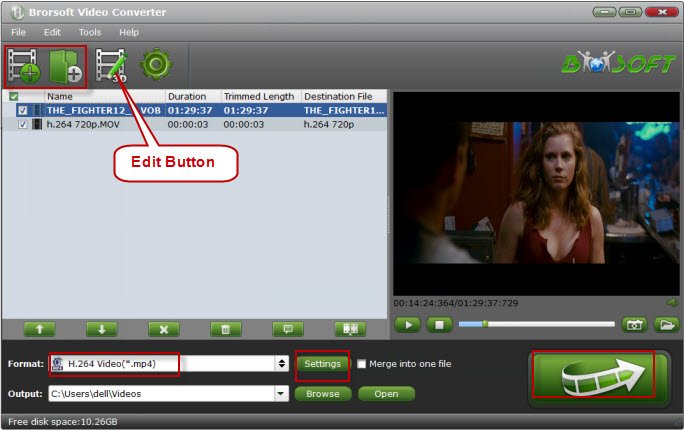
Step 1: Load 3D Blu-ray movies

Install and launch Brorsoft 3D Blu-ray Ripper, and then load your 3D source movies to this program.


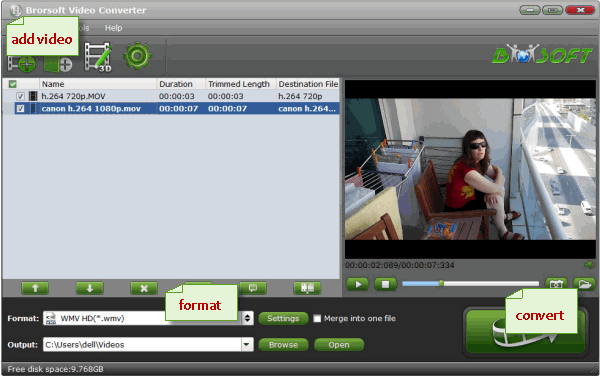
Step 2: Choose an output format

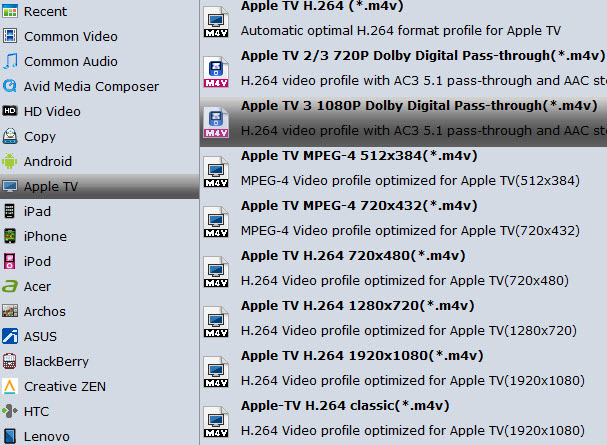
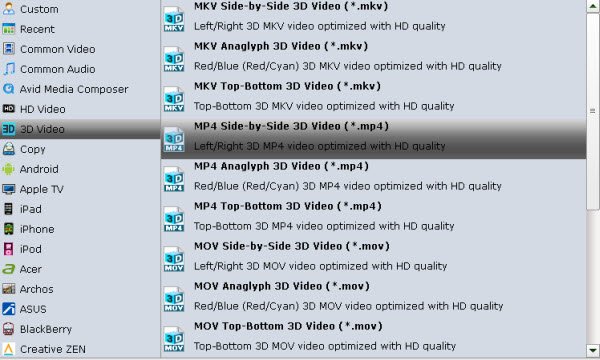
Google Cardboard can accept 3D SBS MP4 so you can click "Format" bar on the interface then navigate to "3D Video" to choose "MP4 Side-by-Side 3D Video (*.mp4)", "MP4 Anaglyph 3D Video (*.mp4)" or "MP4 Top bottom 3D Video (*.mp4)" as the output format.


Tips: Click "Settings" button to do corresponding settings regarding to video, audio like video codec, file size, video bitrate, frame rate, etc. Plus, you can also select 3D Anaglyph like Left/Right mode.

Step 3: Start to rip 3D Blu-ray to 3D SBS MP4

Hit the "Convert" button to transfer your 3D Blu-ray to MP4 Side-by-Side 3D video for playback with Google Cardboard. After conversion, you can hit "Open" to find the generated 3D videos. Then, you can transfer the converted video files to Android phones or iPhone and other devices for Google Cardboard enjoyment.

Related Articles:
Entirely restore your iPhone from backup
Rip DVD ISO to H.264 MP4/MKV/MOV
Supported Video Formats by VR Headsets
Encode TiVo Shows to MP4 fast and easily
What if We erase iPhone contacts accidentally
How to Rip and Upload DVD movies to Dropbox
All-in-one iPhone Backup Entirely or Selectively
How to convert DVD to H.264 MKV easily and fast
Factory Reset Your iPhones without using Apple ID
How to rip 3D Blu-ray for viewing on Zeiss VR One
How to Convert 3D Blu-ray to SBS 3D MKV Videos
Play 3D Blu-rays in SBS 3D MP4 format on Gear VR
Rip Disney (3D) Blu-ray Effortlessly in Windows/Mac

Tuesday, February 23, 2016

AX53 and FCP 7 Workflow- Ingest/Import Sony FDR-AX53 XAVC S 4k to Final Cut Pro 7 (FCP X)

If you want to import Sony FDR-AX53 XAVC S to Final Cut Pro 7, FCP X, it won’t work. So, is there any possible way to smoothly edit XAVC S files from Sony AX53 in FCP 7/X perfectly?

FDR-AX53, which offer 4K video quality along with Balanced Optical SteadyShot? image stabilization, Fast Intelligent AF and a new onboard microphone, ensuring high-quality sound in a small package. With a 1.6x larger sensor than it’s predecessors and 20x optical zoom, the FDR-AX53 looks to be a feature full camera system, for a price around $1000 and available next month.

Regardless of the NLE, I think editing in 4K is a potential exercise in frustration. XAVC-S format differs from XAVC in that it uses GOP codec of H.264/AVC for video file compression; it’s not an ideal editable format for NLE based on many users’ experience. So, how to make Sony AX53 XAVC S clips workable in FCP 7/FCP X perfectly?


Alternatively, since Final Cut Pro does not have native editing support for XAVC-S footage, you can transcode Sony AS100V XAVC-S to Prores codec, which has been designed to work especially well as high-quality, high performance editing codecs for Final Cut Pro(no matter FCP X or FCP 6/7).

Through multiple testing, we found Brorsoft Video Converter for Mac can be used as a professional Sony XAVC S Converter Mac under OS X 10.11 (EI Capitan) 10.10, 10.9, 10.8, 10.7 and 10.6, Leopard (10.5), Snow Leopard (10.6), Lion (10.7), Mountain Lion (10.8), Mavericks (10.9), Yosemite (10.10) and 10.11 EI Capitan . The program comes with several optimized format for Final Cut Pro, which enables you to transcode Sony AX53 raw footage to ProRes 422, ProRes 422 HQ, for using in Final Cut Pro X or FCP 6/7 directly. Just download it and follow the tutorial below guide to achieve your goal.

(Note: Click here for OS X 10.5.8)

Converting Sony FDR-AX53 XAVC S for Editing in Final Cut Pro

1. Install the program on Mac and run it. Drag the XAVC S files to the software. Or you can also click "Add" button on the top of the main interface to import video to the program. It supports batch conversion and joining multiple video clips into one file.


2. Click the "Format" bar and select Final Cut Pro> Apple PreRes 422(*.mov) as output format. This format is specially designed for FCP, so that you can edit your original Sony AX53 video in Final Cut Pro perfectly without quality loss.


Tips: Adjust video, audio settings

Click the "Settings" button and customize proper video/audio parameters including Video size, bitrate and fame rate and mroe. Usually 1920*1080 video size and 30fps video frame rate are recommended for FCP editing. Well, if you prefer to work with 4K video, you can adjust video size to get 4K ProRes for FCP

3. After all necessary settings, hit the convert button to start the XAVC S video to ProRes conversion on Mac OS X. Once the conversion process shows in 100%, click Open to get the output videos. Create a project and start editing Son FDR-AX53 XAVC S video in Final Cut Pro 7 or FCP X with light speed.

More Topics:

XAVC S to iMovie
XAVC S to Avid
XAVC S to Adobe Premiere
XAVC S to Sony Vegas Pro
XAVC S to Windows Movie Maker
How to Solve iMovie Won't Import MP4 files
How to Rip and Upload DVD movies to Dropbox
Rip Disney (3D) Blu-ray Effortlessly in Windows/Mac
Convert your FLV videos to Windows Movie Maker for editing
Convert 4K MXF, MOV , MP4 videos to Windows Movie Maker
Convert iPhone H.264 MOV to WMV for Windows Movie Maker

Friday, February 19, 2016

Simplify AVI video conversion to .wmv for Windows Movie Maker Editing

There are some occasions that you want to import an AVI file to Windows Movie Maker for creating a personal video. So, the following paragraphs are all about how to convert AVI to WMM step by step. 

AVI, aka Audio Video Interlaced, is that it is a very old container format created by Microsoft in 1992. This means that an AVI file contains audio and video data streams that can be played together in sync. This is important because the format for the audio or video stream can be different inside the AVI container. For example, the video stream could be compressed using the DivX, Xvid, H.264, VP9 or MPEG-4 codec. 

If your AVI file contains a video stream that uses a more modern codec for compression, Windows Movie Maker may not be able to play it because it can’t decompress that particular codec. Then, what codecs should we use? 

Where do we download an usable AVI codec for Windows Movie Maker? For these problems, many people feel very helpless. Fortunately, there is an easy way to fix the issue. The easy and quick workaround is to convert AVI to Windows Movie Maker compatible file format like WMV. 


As a matter of fact, the AVI to WMM conversion process is much easier than you might have imagined. Pretty much any video converting application would be able to do this. The best program I use now is Brorsoft Video Converter which is an easy-to-use yet powerful high-quality video converter, player and editor. It not only can handle videos in most formats besides AVI to be compatible with Windows Movie Maker (or other NLEs on PC, like Premiere, Avid .etc) quickly and easily, but also offers some cool video editing features like cropping, cutting, merging and so on. Now download the software and start AVI to Windows Movie Maker conversion. 


Step 1: Run AVI to Movie Maker converter and you can import AVI clips to the program through "Add Video" button or "Add from folder" button. If you like, check the "Merge into one" box to join AVI clips together. 


Step 2: Choose output format. This video converter offers optimized format preset for Windows Movie Maker. Just click "Format" menu firstly and then follow "HD Video" to set WMV HD(*.wmv) format. 


Tip: If the default settings do not fit you requirement, you can click "Settings" icon to and enter "Profile Settings" panel to adjust video size, bit rate, frame rate, sample rate and audio channels. 

Step 3: Click "Convert" button to start encoding AVI to .wmv for Windows Movie Maker program. 

When the AVI to Movie Maker conversion task is finished, click "Open" button to get the exported files for transferring to Windows Movie Maker with easy playback or editing. 

Additional Tips: 

This AVI to Windows Movie Maker Converter not only can help you convert .avi to WMM, but also enables anyone with AVI files to use in any non-linear editor like Avid Media Composer, Adobe Premiere Pro, Pinnacle Studio, Sony Vegas Pro, etc as long as transcode AVI to a recognizable format. 

More Topics: 

AVI to After Effects 
AVI to Pinnacle Studio 
AVI to Sony Vegas Pro 
AVI to Sony Movie Studio 
AVI to Avid Media Composer 
How to Make MOV videos editable in Premiere Pro 
Convert FLV clips to edit in Premiere Pro CC, CS6, CS5 
VOB to Adobe Premiere Pro CC/CS6/CS5/CS4 Workflow 
The Steps: Converting MP4 files for Premiere Pro CC, CS6, CS5 
Convert DivX/XviD files for Adobe Premiere Pro CS5/CS6/CC7 
Convert MKV format to Premiere Pro CC7/CS6/CS5/CS4 on Mac 

Tuesday, February 16, 2016

Tips & Tricks for Playing AVCHD (.m2ts) files in Apple TV 4/3/2/1

With this guide, you can smoothly import and add M2TS files in Apple TV 4/3/2/1 by transcoding/converting AVCHD (.m2ts)to ATV compatible MP4 or M4V video.

Undoubtedly, Apple TV is a wonderful digital media player, as its ability to enable us to enjoy various of movies, videos, TV shows and music on a widescreen HDTV with our friends and family. But, for your information, not all video formats are able to be accepted by Apple TV.

Nowadays, M2TS video is familiar to us, which has now widely used by HD camcorders, another extent of MTS files. The point here, you will find it a painful experience to import and add M2TS files into Apple TV 4/3/2/1. There’re some frequently asked questions quoted as below.

"I had ever owned a Canon XA10 camcorder generating files with M2TS extension. And I had shot my sister’s wedding and had been going to show the wedding recordings to the guests as my sister and her husband were coming to give a reception. But that time I was really in a time crashed as my Mac couldn’t read and play the camcorder M2TS footages and I couldn’t put them in my Apple TV to show the wedding on the widescreen TV. "


How to fix this issue? Okay, today here, all of you won't need to worry! Brorsoft Video Converter would help you fill the compatibility gap between M2TS and Apple TV easily.

Overall, it is one of the best video encoding and decoding apps for Apple TV(ATV 4). It assists you to convert a wide range of video formats including M2TS, WMV, MKV, FLV, VOB, MXF and more to MP4, MOV, M4V for playing smoothly and freely on Apple TV while keeping the original video quality. Plus, it also provides hundreds optimal presets for Apple TV, iPad, iPhone, Galaxy Tab, Amazon Fire TV, Samsung TV, Nook HD, etc to satisfy your diverse needs. If you are using a Mac, please turn to the Mac version, which supports converting M2TS files for playing on Apple TV on Mac (El Capitan included).

Guide: Fast convert M2TS to the Apple TV 4/3/2

Step 1: Import M2TS video files to Apple TV Converter.
Launch the best Video Converter for Apple TV. Click the button "File" to add video files to it. If it is necessary, you can double click the each file to have a preview.


Step 2. Choose the output format

Click "Format" bar and turn to the Apple TV category. The program has a number of presets for Apple TV, Apple TV 2, and Apple TV 3rd Generation. Here "Apple TV 3 1080p Dolby Digital Pass-through (*.m4v)" preset is recommended.


Note: By choosing this format, you will get two sound tracks in the result M4V video, one is stereo, and the other is AC3 encoded Dolby Digital 5.1 pass-through. When your Apple TV is connected to audio receiver, the 5.1 surround sound will work. When ATV is connected to your HDTV only, the stereo track will work.

Step 3. Start converting M2TS to Apple TV

After all settings, tap "Convert" button to start the M2TS to Apple TV conversion immediately.

Once conversion completes, you can get the output files via "Open" panel for your Apple TV effortlessly. Now you can enjoy your M2TS videos on Apple TV without any issue.

Stream M2TS to Apple TV via AirPlay or iTunes

Via AirPlay: Firstly, to use AirPlay, you need to prepare one of the following devices: iPhone 4 (or later), iPad, iPad mini, or iPod touch (4th generation or later). Add the converted M2TS movies to iTunes and sync to your iOS device.

Secondly, be sure iOS device and Apple TV are in the same Wi-Fi network; start play the video on your device, and then swipe up from the bottom of your device screen to access Control Center and tap AirPlay; finally, tap the name of the device you want to AirPlay to.

Via iTunes: Firstly, add the converted M2TS videos to iTunes. Then, go to iTunes > Preferences, choose Apple TV, and make sure "Look for Apple TVs" is selected.

Secondly, on your Apple TV, choose Settings > Computers > "Connect to iTunes," and note the passcode displayed; in iTunes, select the Apple TV (below Devices), and enter the passcode.

Thirdly, click the Summary button and select one of "Automatic Sync" and "Custom Sync".

More Topics:

How to Get iPhone out of Recovery Mode
How to convert TiVo to MKV easily and quickly
Transcode and Import Sony FS5 XAVC to Final Cut Pro
How to convert Fraps AVI to MPEG-2 for Pinnacle Studio
How to Convert AVCHD to XviD video files (Wins & Mac )
Fast convert MKV to Apple TV 3 video format MP4 with AC3 5.1 sound
Convert Canon HF10 AVCHD MTS/M2TS to Apple TV 4/3/2/1 MP4 Format
Connect the new Apple TV 3 to iTunes- Sync movies, music to the new Apple TV 3
Convert 1080p video to the new Apple TV 3- Play 1080p movie on the new Apple TV 3 freely

Friday, February 12, 2016

DVD to HDTV (Best quality DVD Ripper) - Watch and Play DVD movies on HDTV

This guide tells you how to convert DVD movies to HDTV videos so as to watch DVD (ISO, IFO) movies on HDTV devices with the help of Brorsoft DVD to HDTV converter. 

By loading a few DVD movies onto an external hard drive, then they can be viewed on your Mac computer as well as your HDTV, and this gives you the advantage of playing the movies back on a much bigger screen for a much better movie experience, and that’s what this tutorial is going to teach you – play your DVD movies via your external hard drive, through to your HDTV screen. 

To solve this problem, there are many different methods has been created. The most popular method is to convert DVD to HDTV supported format. 


Preparation: To rip and backup DVD discs, what you need is a DVD ripping tool. Brorsoft DVD Ripper is the bee's knees, which can help you finish DVD conversion bypassing DVD copy protection. With it, you can convert DVD to almost all regular video formats like MP4, MOV, MKV, FLV, WMV, AVI, etc. and even extract MP3, WMA, FLAC, OGG, etc. audio from DVD movies. Best of all, it allows you to copy your DVD to hard drive with original structure or main movie only. For Mac users, please turn to DVD Ripper for Mac, which enables you to convert DVD, ISO image files, Video_TS to HDTV friendly video on Mac OS X.(Yosemite/El Capitan included). Follow the easy steps to rip and convert DVDs to HD TV compatible video. 

Download DVD Ripper for HDTV: 

  (Note: Click here for OS X 10.5) 

How to Rip and Play DVD on HDTV through USB 

Step 1. Load DVD movie files 

Launch the DVD to HDTV converter. Insert the DVD disc to your computer drive, and then click the "DVD disc" icon on the interface to navigate to the movies you want to convert. You can also add ISO file, IFO file or DVD folder. By clicking the dropdown list of "Subtitles", you can select your preferred subtitles while viewing your DVD movie. 


Step 2. Select output format 

Click the "Format" drop-down button to select HDTV more compatible video. Generally, H.264 MP4 video from the "Common Video" category is a wise choice. Of course, you can choose a decent profile like Samsung TV (*.mp4) from TVs profile list. 


Step 3. Advanced settings(optional) 

Before start the DVD conversion, you can click the Settings icon and adjust the video bitrate, codec, frame rate, audio sample rate, etc parameters. You can also click Edit to crop the source video so as to get the part you want and get rid of some black bars or even trim the ads part off. 


Step 4. Start converting 

Click Convert button to start ripping DVD to HDTV instantly. After the conversion, head to the destination folder for the output videos, drag the converted files to your USB drive, plug the USB flash drive in you HD TV and enjoy. 

Related Guides: 

How to Rip and Stream DVD movies via Roku 
Guide on Viewing VOB files Via Apple TV 4/3/2 
How can i Play MKV file on a Philips TV by USB 
Steps: Convert DVD to Roku 3 compatible format 
Sony Bravia TV won't Play MOV medias - Solved 
How to Rip DVD for Playback on Amazon Fire TV 
Tutorial: Converting AVI Videos to PS4 friendly format 
Tutorial: Converting MKV Videos to PS4 friendly format 
How to Rip DVD Movies for Playback with Samsung Gear VR 
How to rip DVD movies to DLNA supported MPEG-4 formats