Wednesday, February 25, 2015

iTunes 12 VOB-Best way to import VOB files to iTunes 12(Yosemite)

How to easily add VOB files to iTunes Library for iPad, iPhone, and iPod playback?

Perhelps the best way is to convert VOB to iTunes compatible format by a professional VOB to iTunes Converter app.

Now , take this article for learning the step by step to convert VOB to iTunes friendly MP4/M4V/MOV in Mac(Yosemite included).


Source From: Convert and Import VOB to iTunes Mac Guide

The incompatibility of VOB file and iTunes always exists there as iTunes can only support MP4, MOV and M4V format. Then, how to import VOB to iTunes on Mac easily? The best workaround we’ve worked out yet is to convert VOB to iTunes friendly format on Mac OS X, ensuring maximum quality and efficiency when playing, syncing with iTunes.

If you have problems when adding VOB files to iTunes and want to have smooth playback, you can read on the article to learn more. Here I will outline how to encode VOB file to iTunes(iTunes 12) easily and quickly.

Convert and Import VOB to iTunes Mac Guide:

The quick workaround is to use the easy-to-use yet professional app Brorsoft iMedia Converter for Mac which can be used as the best VOB to iTunes Converter under Mac OS X(Yosemite, Mavericks, Mountain Lion). With it, you can effortlessly transcode VOB to MP4/MOV/M4V for iTunes, and it works well and converts flawlessly.

Note: This guide below uses Mac screenshots to show you how to finish the conversion easily. The way to convert VOB to iTunes on Windows is the same, just get the Windows app Brosoft Blu-ray Video Converter Ultimate.

1. Add VOB to the conversion software

Once you run the Mac VOB to iTunes converter program, click “Add Video” button or “Add from folder” button to load your source VOB files. Directly drag the files to the program interface is supported as well.


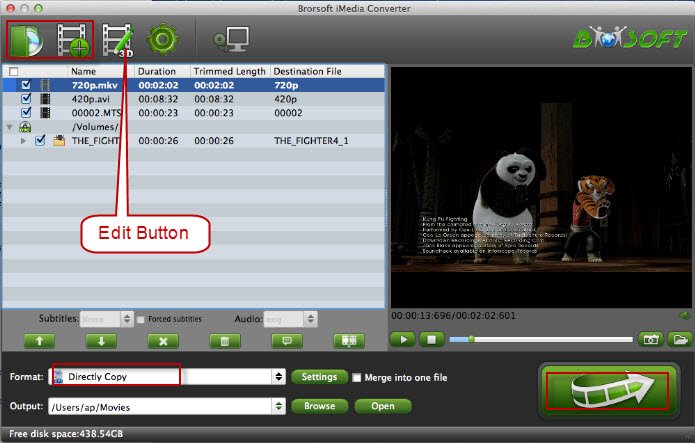
2. Select iTunes supported format

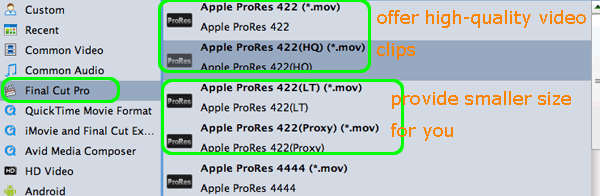
Since iTunes supports MP4, M4V and MOV formats, you can click Format bar and choose any of the three from Common Video as the output file format. If you want to import .vob to iTunes for playing on iPhone, iPad, iPod, Apple TV, etc., you can also directly select a format from decent device preset like iPad.


3. Start VOB to iTunes conversion

Finally click the Convert button to begin VOB to iTunes Mac conversion.

After encoding process has finished successfully, find the output files by hitting the Open button. Now you can drop converted VOB files into iTunes or use the “Add to Library” option on the “File” menu. Once all this is done, sync your iOS device with iTunes and your videos will be ready to play, enjoy them!

See also:
How to stream AVI to Plex Media Server
How to Convert VOB to After Effects editable format
Efficient Way to Edit Blackmagic 4K in Final Cut Pro 7
How do I edit H264(MP4/MOV) video files in Sony Vegas
Convert Sony FS7 XAVC to ProRes MOV for FCP on Mac
Transcoding MXF files to MPEG-2 for editing in After Effects
Transcoding 4K clips to Apple ProRes for working with FCP X
2 Parts Guide you to Transfer AVI from PC to Tivo for Playback
Play and Edit YIFY Torrents Movies on Portable Devices Or NLE
Best MPEG Streamclip Alternative for Mac to convert video files to any format

Friday, February 20, 2015

PMW-300 Work with FCP-Solution for Sony PMW-300 XACAM (native MXF files) and FCP X/7/6 in Mac

Trouble importing Sony PMW-300 MXF files to Final Cut Pro X? This post guides you through the process of FCP set up to import Sony PMW-300 XDCAM footage, Now transferring Sony PMW-300 MXF files to FCP 6/7/X.

Q:
Can we import and edit Sony PMW-300 XDCAM MXF videos in FCP?"

Definitely you can! Just Brorsoft Sony XDCAM MXF Converter for mac, which allows you to convert XDCAM files to Apple ProRes for smoothly editing in Final Cut Pro 6/7 and FCP X. Besides FCP, this Mac Sony XDCAM Converter also generates best editing format/codec for filmmakers and video enthusiasts to use in different NLE apps, such as After Effects, Adobe Premiere Pro, iMovie, Final Cut Express and more. And The whole process takes only three easy steps to convert:
1. Add MXF videos from HD camcorders Sony PMW-300. Then,
2. Select the preset profile FCP(" Final Cut Pro > Apple ProRes 422 (*.mov) is FCP’s most compatible format").
3. At length, only one click of “convert” to start conversion from MXF to Prores.

Okay, following pages, let's look at the whole process in detail.

Free Download the Mac Sony MXF to ProRes Converter:

( Note: Click here for OS X 10.5)
Guide: Convert Sony PMW-300 footage to ProRes 422 for Final Cut Pro

Step 1. Launch the program and click the "Add" button to load PMW-300 .MXF files for converting.


Step 2. Click on the “Format” and you will get a dropdown menu and then select Final Cut Pro > Apple ProRes 422 (*.mov), which is the best format for Final Cut Pro.


Step 3. Click “Settings” to set video resolution (1920×1080/1440×1080/1280×720/720×480), bitrate(from 1Mbps to 20Mbps), frame rate (24p/30p) as you like. To deinterlace, crop, trim XDCAM HD MXF video, click “Edit” menu.


Step 4. After above settings, hit “Convert” button to start transcoding Sony PMW-300 MXF to ProRes for directly importing to FCP.

After a quick conversion, you can click the Open icon to locate the converted ProRes MOV files. Now import your new ProRes files into FCP 6/7X for editing natively.

Editor’s Note: At launch the camera will have the Sony XDCAM codec built in, offering 50Mb/s 422, 35Mb/s 420 as well as both IMX and DVCAM in standard definition. So a great range of codec choices out of the box. This year later you’ll be able to add the new XAVC codec as an option. When you meet the XAVC to FCP, iMovie, FCE, Avid MC, Adobe Premiere Pro, incompatible issues, this professional XDCAM/XAVC Converter for Mac will still be the big help for you.

More Guides:

Easily Import MP4 files to iMovie for Editing
[How-to]: Transocde MP4 video to AIC for iMovie
Transcode Nikon MOV files to Windows Movie Maker
How to Convert DVD ISO to AVI and any other formats
How to Convert MP4 for Editing in Windows Movie Maker
How to Rip Blu-ray to MPEG for Playback Easilyon Windows/Mac
Load Panasonic DMC-GF7 AVCHD MTS to FCP 7, FCP X on Mac
Tips working Sony F3 XDCAM EX MP4 video in Premiere Pro
Get Canon XA25 AVCHD(.MTS), MP4 video into Final Cut Pro X/7
Converting M2TS/M2T to DNxHD .mov that Avid Media Composer
Trancoding XAVC to Final Cut Pro friendly ProRes codec
Rip DVD movies into MP4 format for Asus Zenfone 2 playing

Monday, February 16, 2015

Work Canon XA10 with FCP 7/X, Adobe Premiere Pro CC/CS, iMovie 11/09/08 on Mac (Yosemite)

Trying to convert camcorder Canon XA10 MTS files to MOV for editing in Mac OS X and Windows with FCP, iMovie, Premiere Pro? Here is the Step by Step Gudie for converting MTS to MOV with ease!

Source From: Editing Canon XA10 AVCHD MTS files with FCP/iMovie/Premiere Pro

The Canon XA10 records AVCHD video up to 24Mbps and 4:2:0 color space, and it can capture HD video in a variety of frame rates, including 60i, as well as 30p and 24p variants of 60i, and true 24p (23.98fps). If you have shot some MTS/M2TS videos with your Canon XA10 AVCHD camcorder, then you probably want to convert XA10 MTS to MOV on Mac so as to edit your home movies in programs like Final Cut Pro and iMovie, or just play MTS/M2TS files on Mac (OS X 10.9 Mavericks) conveniently with Apple players. Here you'll learn how to convert MTS files to MOV on Mac (Mountain Lion and Mavericks included).


Brorsoft Mac AVCHD MTS Converter is strongly recommended to help you change MTS to QuickTime MOV format on Mac OS X 10.6, 10.7, 10.8 Mountain Lion and 10.9 Mavericks with ultra-fast conversion speed and lossless video quality, so that you can add the video to FCP/iMovie/Adobe for editing. It provides the video preset for FCP/iMovie/Adobe Premiere Pro so you don't need to worry about the compatibility. In addition, output formats like MOV, MP4, AVI, WMV, MKV, FLV, etc. are provided and 150+ video presets for portable devices like iPhone, iPad, iPod, etc. are offered for your choice. Just download it and follow the steps to get your work done.

(If you're using Windows, please get the Windows version to convert MTS videos to MOV in Windows 8/7/XP/Vista.)

Download Top MTS Converter for Mac :


Quickly import Canon XA10 video to Final Cut Pro X (FCP 6/7)

Step 1: Download, install and run Brorsoft MTS/M2TS Converter for Mac, and then click the "Add" button to load the .mts videos. You can also use the drag-and-drop method to load the 1080p .mts files to the application UI.


Step 2: Click the format bar or the pull down menu of "Format" to select output format. To get Canon XA10 AVCHD into Final Cut Pro X or FCP 7/6, the best format is "Final Cut Pro> Apple PreRes 422".


Step 3: Click the “Convert” icon under the preview window, and the Mac MTS to ProRes Converter will start transcode Canon XA10 MTS to Prores MOV for FCP(X) on Mac.

After the conversion, click "Open" to locate the result videos and then launch FCP X, choose File > Import > Files…, and browse to where you save the converted AVCHD clips to. Choose the videos that you'd like to add. Now you can start fun away with editing Canon XA10 video in Final Cut Pro X or FCP 7/6 without problems.

Additional Tips:
1. If you are also a FCP X user, before you try to do the conversion, don’t forget to make sure that you have installed the Apple ProRes Codec manually since the FCP X asks users to install it by themselves.
2. If you want to edit AVCHD MTS in iMovie, you just need to choose the "iMovie and Final Cut Express -> Apple InterMediate Codec (AIC) (*.mov)" in the second step. For Avid Media Composer, choose "Avid Media Composer > Avid DNxHD(*.mov)" as output; For Adobe Premiere Pro or Vegas Pro, choose Adobe Premiere/Sony Vegas> MPEG-2(*.mpg) as output.

More Topics:
Import 4K to FCP 7 with ProRes codec
Avid Media Composer MTS files workflow
How to upload GoPro Hero4 4K to YouTube
Editing Sony FS7 4K XAVC Video Smoothly
Convert and Import VOB to iTunes Mac Guide
Convert TiVo to MP4 Mac (Yosemite/Mavericks)
Rip Blu-ray ISO files Playback via WD TV Live(Plus, Hub)
Simple Workflow on editing 4K video files in iMovie 11/09/08
Rip and Convert Blu-ray/DVD movies to WD TV Live H.264 MP4
Convert Sony F65 4K MXF videos to MPG for Premiere Pro CC/CS6/CS5

Wednesday, February 11, 2015

DVD MPEG-1, MPEG-2, MPEG-4-Tips & Tricks Converting from DVD to MPEG in Mac(Yosemite/Mavericks)

Get lots of DVD movies, well, how about learning this guide to convert DVD video to MPEG, MPEG-1, MPEG-2, MPEG-4 step by step.

How do you change DVD to MPEG in Mac? What I want to do is cut a little section from a DVD into MPEG format and put it on YouTube. With luck, I’ve found a possible way to make it after long time searching. Chances are, if you got some DVD movies and want to convert DVD to MPEG for easier organizing, playing and sharing, go through this page to get clues.

First you should know, most commercial DVDs are encrypted, that’s why some freeware like Handbrake can’t handle it. To get the work done, more than one people recommend Brorsoft DVD Ripper for Mac to encode DVD to MPEG bypassing DVD copy protections.

This DVD ripping software works as the best app to rip and convert DVD into a different format (e.g. MPEG-1, MPEG-2, MPEG-4) under Mac OS X Yosemite, Mavericks, Mountain Lion, etc with least quality loss. You should then be able to open, play, edit, upload the new file without any hassle. You could get wonderful output files and never worry about out of audio/video sync. If you are running on Windows, please turn to its equivalent Windows version DVD Ripper.

Tutorial: Converting DVD to MPEG in Mac OS X

Step 1: Start up this program, and then click “disc” icon to import DVD movies. ISO image files and IFO files are also supported.


Step 2: Choose the MPEG as output format. Click Format bar and MPEG-1, MPEG-2, MPEG-4 are provided for you in Common Video profile list. To adjust video and audio parameters like codec, aspect ratio, bit rate, frame rate, sample rate, you could click on "Settings" button.


Tip: If you want to rip DVD to mpeg-4 (*.mp4) for your iPad, iPhone, Galaxy Note, Nook Tablet, etc with best settings, please choose the specific profiles the software has preset as output format and get the suitable settings.

Step 3: Start ripping DVD to MPEG format

Click Convert button to start DVD to MPG conversion under Mac OS X(Yosemite). The conversion process will take a while, and you’ll see an encoding progress bar.

Once finished, click the Open button in the main interface and you can locate the encoded DVD files effortlessly. And then you are able to use these files as you want for your portable devices, PC, media player or video editing programs.

Additional Tips: As you see, this DVD to MPEG Converter Mac can encode DVD to MPEG video easily. What's more, it also allows you to convert DVD/ISO to any video, audio format like AVI, MOV, WMV, MKV, FLV, MP3, WAV, M4A, etc as you want with the best quality.

See also:

Rip Blu-ray/DVD to WD TV Live (Plus, Hub)
Ripping DVD to iMovie 11/10 on Mac Yosemite
Rip and Copy Blu-ray library to Plex Media Sever
How can i use a VOB files in Windows Movie Maker
VOB to Adobe Premiere Pro CC/CS6/CS5 Workflow
Stream and watch Blu-ray(ISO) movies with WD TV
Practicable way to Watch and View DVD movies on LG G3
Rip and Convert Blu-ray DVD to MP4/MOV for WD my Cloud
Easy way to convert DVD/ISO for playing on ASUS ZenFone 2

Saturday, February 7, 2015

Sony 4k xavc to fcp 7- How to make Final Cut Pro 7 ingest 4K XAVC videos

Summary: Wanna transfer XAVC footage to FCP 7 for editing? Follow this guide, and you will know how to edit (4K) XAVC videos in FCP 7 with friendly codec Apple ProRes easily.

The newly released Sony PXW FS7, Sony PXW-X70, PXW-X180, PMW-1000, PXW-Z100… or typical models Sony F5, F55 all record XAVC videos. To enable users to have smooth XAVC to FCP workflow, Sony has introduced XAVC Plug-in for Apple (PDZK-LT2), which provides support for XAVC files shot on Sony SxS card, allowing viewing and editing capability in Final Cut Pro X. Whereas, the previous version of FCP 7 is still not compatible with XAVC files. This XAVC workflow guide offers the tips and tricks on how to work with XAVC in Final Cut Pro 7 easily. Read on.

Well, it is a pity that FCP 7 can’t support XAVC especially in 4K. The easy workaround to import XAVC to FCP 7 is to transcode (4K) XAVC clips into FCP 7 compatible Apple ProRes, which is a line of intermediate codecs. They are intended for use during video editing. And Brorsoft Video Converter for Mac is recommended here to help you finish the XAVC to ProRes conversion task.

This video converter for Mac can be used as a Sony XAVC Converter Mac under OS X Snow Leopard (10.6), Lion (10.7), Mountain Lion (10.8), Mavericks (10.9), Yosemite (10.10). With it, you can effortlessly encode/re-encode XAVC files for smoothly importing and editing in various non-linear editing systems (NLE), including Final Cut Pro 7 as well as FCP 6, FCP X, iMovie, Final Cut Express, Adobe Premiere Pro, Avid Media Composer, etc. Download it and follow the tutorial below.

Trancoding XAVC to Final Cut Pro friendly ProRes codec

STEP 1. Download, install and run the XAVC to FCP 7 Converter; click "Add Videos" icon to load your source XAVC files.


STEP 2. Click “Format” bar and choose “Final Cut Pro >> Apple ProRes 422 (*.mov)” as output format for editing XAVC in FCP 7 with natively supported video codec.


STEP 3. Click the Settings icon if you’d like to customize advanced audio and video parameters like Video Codec, aspect ratio, bit rate, frame rate, Audio codec, sample rate, audio channels.


STEP 4. After all necessary settings, hit the convert button to start the XAVC to ProRes conversion on Mac OS X. Once the conversion process shows 100%, click Open to get the output videos. Now you can edit the encoded Sony XAVC videos in FCP 7 without any problem.

See also:

How to Import and Edit 4K footage in Avid MC
How to Work XAVC Clips in Sony Vegas Pro 13/12
How to Get FCP 7 Work with XAVC S clips perfectly
XAVC S workflow in Premiere Pro CC, CS6, CS5, CS4
Tricks for Editing Sony F55/F5 XAVC clips in Final Cut Pro
Tips working Sony F3 XDCAM EX MP4 video in Premiere Pro
Convert Sony AS100V 50Mbps XAVC S to ProRes for FCP 7/X
Get Canon XA25 AVCHD(.MTS), MP4 video into Final Cut Pro X/7
Converting M2TS/M2T to DNxHD .mov that Avid Media Composer

Thursday, February 5, 2015

XAVC issues in Premiere Pro CC, CS6, CS5, CS4- Solution

Summary: XAVC is still unsupported in Adobe Premiere Pro? This article teaches you how to convert and import XAVC files to Premiere Pro CC, CS6, CS5, CS4 without rendering or any other problems.

Sony's had a couple of great cameras like PXW-F5, PXW-F55, PXW-Z100, PXW-X500, PXW- FS7… that support recording with a new file format XAVC. If you are the Adobe Premiere Pro CC(7.2) users, you will feel lucky that it can support XAVC Intra(4:2:2 10 bit) encode/export both for HD, 2K, QFHD and 4K. However, there’s not going to be native support for the XAVC codec in most NLEs. The previous version of Premiere Pro CS6, CS5, CS4 cannot support XAVC codec natively. Fortunately, I’ve figured out the solution for editing XAVC in Premiere Pro CC, CS6, CS5, CS4 flawlessly. Read on to learn the XAVC to Premiere Pro CC/CS6/CS5/CS4 best workflow.

We’d accept the truth XAVC codec as a new codec is not widely supported. To make the XAVC compatible with Adobe Premiere Pro, the easy workaround is to convert XAVC (4K) to Premiere Pro edit-friendly MPEG-2 video, which ensures best results when using in Premiere Pro CC, CS6, CS5, CS4. Brorsoft Video Converter for Mac is the solid tool to help users make the XAVC to Premiere conversion on Mac OS X. Download it and follow the tutorial below.

How to Import Sony XAVC to Premiere CC/CS6/CS5/CS4 for editing

The below guide uses Mac screenshot. If you are a Windows PC user and willing to encode XAVC to MPEG-2 for Premiere CC/CS6/CS5 on Windows, Brorsoft Video Converter is your first choice.

Step 1: Load files to the program

Launch the XAVC to Premiere Pro Converter and click "Add File" button to locate the Sony XAVC file(s) you want to add. Or you can drag&drop the files into software window list directly.


Step 2: Choose Premiere Pro preferred format

Click "Format" pull down list to select Adobe Premiere/Sony Vegas> MPEG-2(*.mpg) as the best video format for Premiere Pro. WMV, MOV formats are the good choice as well.


Step 3: Adjust the video, audio settings(optional)

Click "Settings" to fix the frame rate, bitrate, video size, etc to your needs. To have a smooth editing with Adobe Premiere Pro, you need create the files with the appropriate resolution and frame rate that matches your source footage.

Step 4: Start conversion

Finally, click the big "Convert" button at the bottom right corner to finish encoding XAVC for Adobe Premiere on Mac OS X.

When the conversion is done, you can find the output files by clicking "Open" button on the main interface, then you can transfer the encoded XAVC files to your Premiere Pro CC/CS6/CS5/CS4 to play and edit without any problem.

Editor’s Note: For Mac users the Premiere Pro CS6 requires the installation of additional third-party software like “Final Cut Pro” from Apple to be compatible with XAV HD. For Windows users, the videographer needs to install the Main Concept/Rovi Total code plugin which will enable XAVC in both HD and 4K. If you don’t like the way, you can turn to the above recommended XAVC to Premiere Pro Converter to fast solve the XAVC to Premiere Pro incompatibility issues, no matter Premiere Pro CC or CS6, CS5, CS4 or any version.

Read More:

Ripping Disney DVDs on Mac
Top fixes for MKV and iTunes on Mac OS X
How to Import and Edit 4K footage in Avid MC
Editing Blu-ray files in iMovie/Final Cut Express
How to Work XAVC Clips in Sony Vegas Pro 13/12
Importing and editing XviD in Windows Movie Maker
How to Get FCP 7 Work with XAVC S clips perfectly
XAVC S workflow in Premiere Pro CC, CS6, CS5, CS4
Edit Sony PMW-F55/F5 XAVC footage in Adobe Premiere Pro
Convert Sony AS100V 50Mbps XAVC S to ProRes for FCP 7/X

Tuesday, February 3, 2015

C100 Mark II and Final Cut Pro-Editing with Canon C100 Mark II AVCHD footage on Mac FCP 7/X (Yosemite)

Today, here I would like to share the Canon C100 Mark II and Final Cut Pro editing workflowwith everyone here! This article aims to give you an easy solution to editing Canon EOS C100 Mark II AVCHD in Final Cut Pro 7, FCP X on Mac OS X (Yosemite included) without hassle.

Source From:Editing with Canon C100 Mark II AVCHD footage on Mac

Featuring Canon’s innovative Dual Pixel CMOS autofocus technology, the EOS C100 Mark II camera has been designed to improve the shooting experience with increased accuracy and control. Advanced image processing provides enhanced color resolution and virtually eliminates unwanted artifacts. Improved ergonomics and a larger, tiltable electronic viewfinder gives the EOS C100 Mark II a more comfortable handling experience. The EOS C100 Mark II’s ability to record a variety of frame rates and codecs, including 1080/60p AVCHD and MP4 files, offers vast potential to independent production companies, documentary filmmakers, and event videographers.

As we know AVCHD .MTS format is great for recording footage from the camera, but it can be a challenge for editing. Although Final Cut Pro X now has the ability to support MTS videos natively, it doesn’t mean you can edit MTS in FCP smoothly all the time. One typical issue is that MTS files that have been copied from the native file hierarchy of the camera’s media card could not be imported to Final Cut Pro.

To solve those problems, the quick workaround is to transcode Canon C100 MK 2 AVCHD to Final Cut Pro X/7 natively supported formats (Apple ProRes are highly recommended). Along with some help from third-party software, it can be done effortlessly.


The utility applied here is the professional Brorsoft AVCHD Converter for Mac which can be used as a top MTS/M2TS to ProRes Converter under OS X Snow Leopard (10.6), Lion (10.7), Mountain Lion (10.8), Mavericks(10.9), Yosemite(10.10). With it, you can effortlessly transcode MTS/M2TS AVCHD files to ProRes 422 encoded MOV for Final Cut Pro 7/X, and it works well and converts flawlessly. Meanwhile, the Mac MTS conversion tool can create files compatible with various non-linear editing systems including Avid Media Composer, FCE, iMovie, and Adobe Premiere Pro, Premiere Elements, After Effects, etc. Below is how.

Steps to convert MTS videos from Canon EOS C100 Mark ii to Final Cut Pro 7, FCP X acceptable format

Step 1. Load AVCHD files to the Program

You can directly drag and drop the C100 mk ii mts files to the software, or click "Add" or "Add From Folder" to locate the .m2ts files into the program. Batch conversion is supported.


Step 2: Choose an optimal target format

Click the "Format" bar and select Final Cut Pro> Apple ProRes 422(*.mov) as output format, which should work with Final Cut Pro perfectly.


Tip: If you wanna, you can go to the "Settings" page to customize proper video/audio parameters including Video size, bitrate and fame rate and more.

Step 3: Hit the Convert button in the main interface to start the Canon C100 Mark ii MTS to FCP 7/X conversion on Mac OS X.

After the conversion, you can run Apple Final Cut Pro 7/ FCP X, go to File -> Import -> Files…, and browse to where you save the converted AVCHD clips to. Choose the videos that you’d like to add for further editing.

P.S. If you want to make your AVCHD MTS files editable in Apple Aperture 3.3/3, iMovie, FCE, Adobe Premiere, Avid Media Composer, etc. the Mac MTS Converter will also be a great choice for you. Choose a proper output format like “iMovie and Final Cut Express-Apple InterMediate Codec(AIC)(*.mov)” for iMovie in the second step.

Related Guides:
How to play, edit MTS in Apple Aperture
Rip and Copy Blu-ray library to Plex Media Sever
Import Sony XAVC-S files to Adobe Premiere Pro
How can i use a VOB files in Windows Movie Maker
VOB to Adobe Premiere Pro CC/CS6/CS5 Workflow
Importing MOV files from Nikon D4S to Final Cut Pro
How to convert M2TS to ProRes for editing in FCP X/7
Encode Panasonic P2 Card MXF footage to Premiere Pro
Converting Sony A7S XAVC S to Final Cut Pro 7 in simple steps
Edit Canon C100 mark ii 1080 60p AVCHD in Avid Media Composer

Monday, February 2, 2015

EOS C100 Mark II Work with Avid MC-Edit Canon C100 mark ii 1080 60p AVCHD in Avid Media Composer

While you transferring AVCHD files from Canon C100 Mark II to Avid MC, problems still come up. Follow the detailed steps below to make EOS C100 MK II 1080p mts/m2ts editable for Avid MC on Mac faster and easier.

Canon has just unveiled the successor to their popular C100, the EOS C100 Mark II, which offers several valuable modifications and upgrades to both image quality and functionality. Dual Pixel AF now comes standard with the Mark II, as well as a built in mic on the body and the ability to simultaneous record MP4 and AVCHD formats.

"I have recorded many HD footages from Canon EOS C100 Mark II that in AVCHD video format, now I would like to import these projects to Avid media composer 5.5 for editing. What I want is to edit AVCHD files natively in AMC on my Macbook, but I found the Avid MC can’t handle the 1080 60p files smoothly."


On Avid official website, it recommends DNxHD or XDCAM codec for editing, and DNxHD codec is the first choice. Along with some help from the MTS Converter for Mac, it can be done. Here I share with you a simple guide on how to convert C100 Mark II AVCHD MTS files to DNxHD format for Avid MC editing flawlessly.

Downloading the App- Brorsoft MTS/M2TS Converter for Mac

Overall, the program is a professional yet easy-to-use MTS to DNxHD Converter on Mac OS X which can not only convert Canon C100, EOS C100 Mark II, Panasonic GH3, Sony FS100, Sony FS700, Sony RX100, Canon VIXIA HF G20, etc recorded MTS files to Avid editable videos, but also provide simple video editing functions for you. The Mac AVCHD Converter can convert HD videos from HD camcorders or DVs (like JVC, Panasonic, Sony and Cannon) for editing in Final Cut Pro, Final Cut Pro X, Final Cut Express, iMovie, Avid MC, Adobe Premiere Pro etc. If you meet the MTS in Avid MC issues on PC, get the equivalent Windows version MTS/M2TS Converter. Just download it and follow the tutorial below to get the work done.

Transcoding Canon EOS C100 Mark II AVCHD recordings to Avid Media Composer

Step 1: Load original MTS files to Mac MTS to DNxHD Converter

Install and Launch the MTS Converter for Avid on your Mac and load your C100 mark ii 1080 60p .mts/.m2ts files to it.


Step 2: Click Format on the main interface and choose Avid Media Composer > Avid DNxHD(*.mov) as output format.

Step 3: Tap the Settings icon, and you can adjust codec, bit rate, frame rate, sample rate and audio channel in the Profile Setting to get the output in best quality.
Tips:
1. For 1080 50i AVCHD files, you can set the video size as 1920*1080, and set the video frame rate as 25fps.
2. For 1080 60i AVCHD videos, set the video size as 1920*1080; while, set the video frame rate as 30fps

Step 4: Start the AVCHD to DNxHD MOV Mac conversion for Avid Media Composer by clicking the “Convert” button. Then you can get the converted .mov files for editing in Avid MC 5/5.5/6/6.5 by clicking the “Open” button.

More helpful features of the Mac MTS to MOV Converter:

1. Check the “Merge into one file” box to join several MTS clips together if you need.

2. Editor (next to “Add” icon)- click to set deinterlace, trim, crop, add watermark, etc.

Once the MTS Mac conversion is done, you can transfer MTS footage into Avid MC for editing smoothly on Mac with ease.

See Also:
Easily Import M2TS to Final Cut Pro 7, FCP X
Transcode Canon PowerShot G7 X MP4 files to AIC
Sony F65 workflow for getting 4K MXF to Avid MC
How to Ingest Panasonic AJ-PX270 MXF to Avid MC
Editing with Canon C100 Mark II AVCHD footage on Mac
Working with Canon EOS C100 MK II and Sony Vegas Pro
Edit AVCHD 2.0(in 1080p 50fps/60fps and 3D) in Apple Aperture
Open Canon PowerShot G7 X MP4 footage in Adobe Premiere Pro
Edit Canon G7 X MP4 videos( MPEG-4 AVC/H.264) to Final Cut Pro