Nikon Coolpix L840 makes use of a tilting, 3.0-inch, non-touchscreen LCD with 921k-dot resolution. Other hardware amenities include the introduction of both Wi-Fi and NFC wireless connectivity -- both of which were absent on the previous model -- making it quick and easy to transfer and share images with your paired smart device.
Image capture is offered in JPEG format only, and videos are recorded using the H.264 encoding in a MPEG-4 container.
Technically, H.264 is highly compressed. It is not designed as a format for editing. That's not where you want to start with editing for high quality results. Then, how to get Avid Media Composer working perfectly with Nikon COOLPIX L840 h.264 MOV footage? A best way is to convert Nikon COOLPIX L840 .mov files to DNxHD, something ensuring maximum editing quality and efficiency when working with Avid MC.

Brorsoft Video Converter for Mac is a professional tool that can deal with most kind of MOV videos regardless of the different codec to DNxHD for Avid editing without quality loss. Plus, with the built-in video editor, you can also choose to trim, crop, add watermark, subtitles to your original videos. For Windows users, please turn to Brorsoft Video Converter. Now just download it and follow the below guide to transcode Nikon COOLPIX L840 MOV for playing and editing in Media Composer perfectly.
Download MOV to Avid Media Composer Converter:

 (Note: Click here for OS X 10.5)
 Guide: How to Convert Nikon COOLPIX L840 MOV to Avid DNxHD for Media Composer
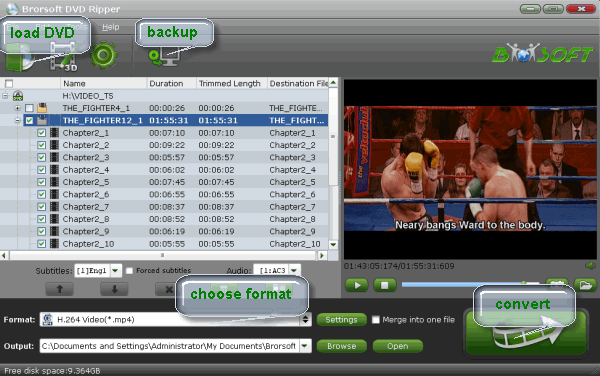
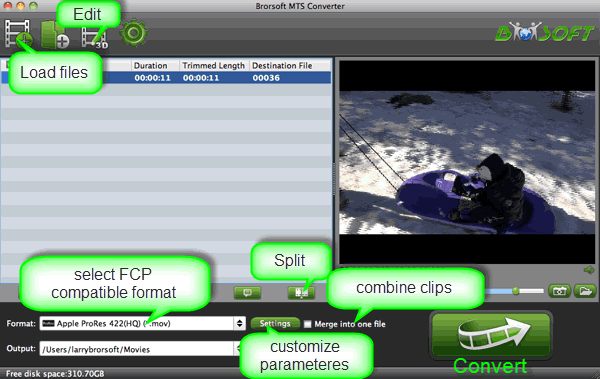
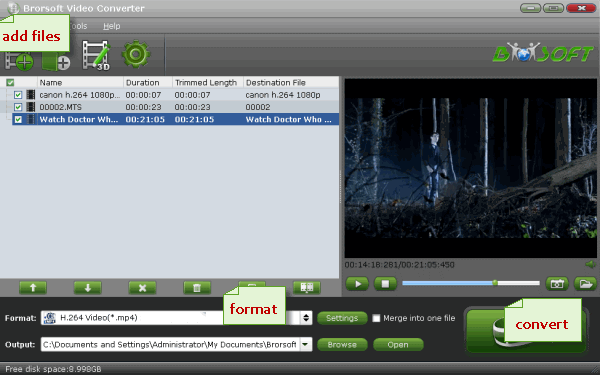
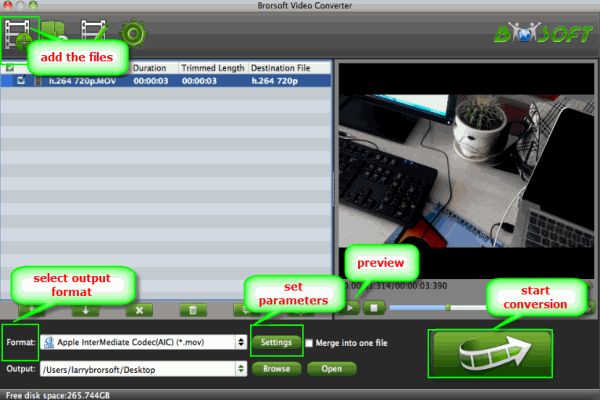
Step 1. Add Nikon MOV footage to the MOV Converter.
Once you run it, click Add button to load your source files. When the MOV files are loaded, you can view the videos from the Preview window.

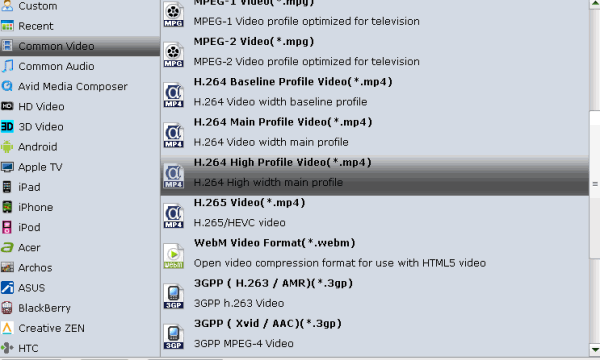
Step 2. Choose DNxHD MOV as output format
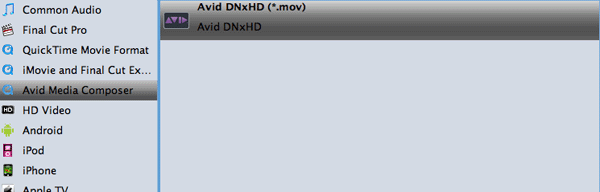
Brorsoft MOV to Avid Converter features the optimized format preset for Avid Media Composer. Go to "Avid Media Composer -> DNxHD (*.mov)" and set it .
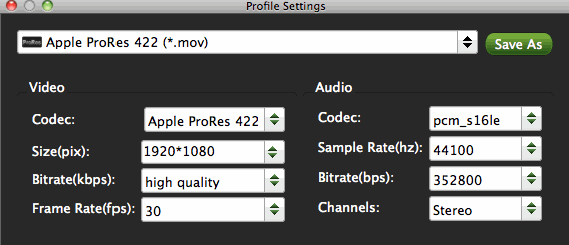
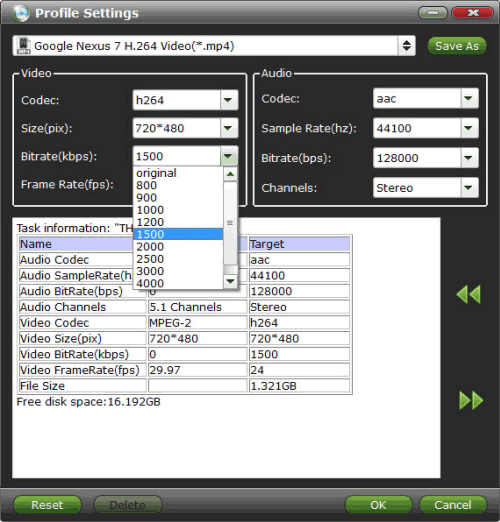
Tips: Advanced video/audio settings
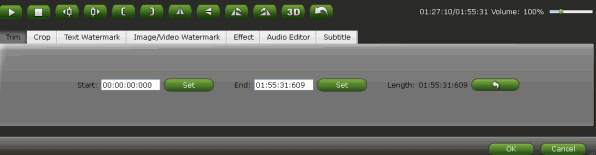
If the default settings do not fit your needs, you can click “Settings” button to adjust audio and video parameters as you like.
Step 3. Convert Nikon Coolpix L840 MOV to DNxHD for importing to Avid Media Composer
Click “Convert” button and the selected MOV files from Canon will be converted to DNxHD encoded MOV. You may check the converting progress and set auto shutdown in the conversion window. After conversion, click “Open” folder to find converted footage for importing to Avid Media Composer.
Additional Tips:
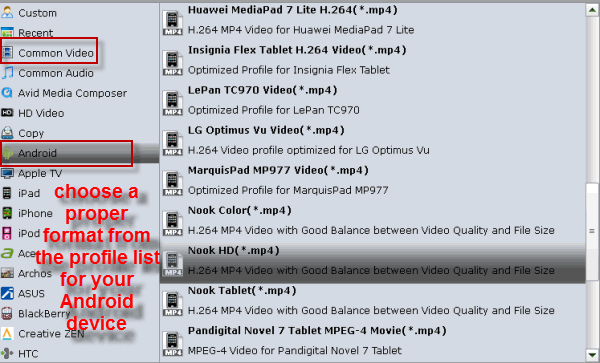
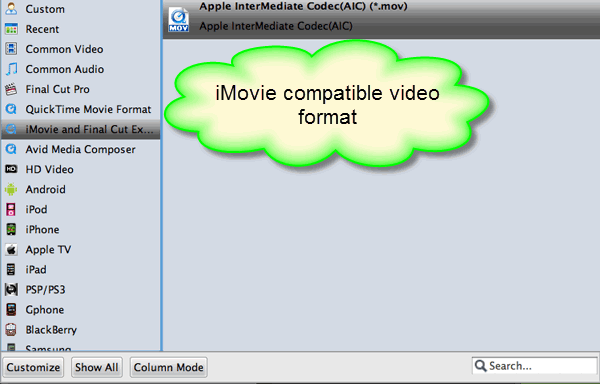
This top Nikon MOV to Avid Converter can also help you convert MOV files for other editing programs. If you want to use Canon MOV files in Final Cut Pro, please choose the “Final Cut Pro > Apple ProRes 422 (*.mov)” as output; for iMovie and FCE, select “iMovie and Final Cut Express -> Apple InterMediate Codec (AIC) (*.mov)”, or choose Adobe Premiere/Sony Vegas> MPEG-2(*.mpg) for Adobe Premiere Pro.
More Topics:
H.264 to iMovie
H.264 to After Effects
H.264 to Sony Vegas Pro
H.264 to Sony Movie Studio
H.264 to Adobe Premiere Pro
H.264 to Windows Movie Maker
Edit Nikon COOLPIX L840 H.264 MOV in Premiere Pro CC/CS6
Encode Canon C300 Mark II 4K MXF to Premiere Pro CC/CS6/CS
Transcoding Nikon COOLPIX L840 MOV for Final Cut Pro X, FCP 7
How to transcode Canon C300 MK II MXF to MPE-2 for PowerDirector